Preparing the Soil
Choosing the Right Location
To successfully grow hyssop, it’s essential to prepare the soil and choose the right location for this herb. Here are some steps to consider:
Preparing the Soil
- Test your soil pH level to ensure it’s between 6.0 and 7.0, as hyssop thrives in slightly acidic to neutral conditions.
- Add organic matter such as compost or well-rotted manure to improve the soil’s structure and fertility.
- Remove any debris or weeds from the area, and level the ground for even growth.
- Loosen the soil to a depth of about 8-10 inches (20-25 cm) using a fork or spade.
Choosing the Right Location
- Hyssop prefers full sun, so choose a location that receives at least 4-6 hours of direct sunlight per day.
- Ensure good air circulation around the plant to prevent fungal diseases and promote healthy growth.
- Avoid planting in areas with standing water or where water tends to collect, as this can lead to root rot and other problems.
- Select a location that’s protected from strong winds, which can damage the plant’s delicate leaves and stems.
By following these steps, you’ll be well on your way to growing healthy and thriving hyssop plants in your garden or indoor space.
Select a spot with well draining soil and full sun to partial shade, as hyssop prefers dry to medium moisture levels.
To begin growing hyssop, it’s crucial to select a suitable spot that provides the right conditions for its growth. The ideal location should have well-draining soil, as hyssop does not thrive in wet or soggy environments. It’s also essential to choose an area with full sun to partial shade, as direct sunlight can promote healthy growth and prevent diseases.
Hyssop prefers dry to medium moisture levels, which means the soil should be moist but not waterlogged. A spot with good air circulation is also beneficial, as it helps prevent fungal diseases that can affect hyssop plants. When selecting a location, consider the mature size of the plant and leave enough space for proper growth.
Before planting, check the pH level of your soil to ensure it’s within the optimal range for hyssop (slightly acidic to neutral). If your soil is too alkaline or acidic, amend it with organic matter such as compost or peat moss to bring it to the ideal pH. This will help create a conducive environment for root growth and nutrient absorption.
Avoid planting in areas where water tends to collect, as this can lead to root rot and other issues. Also, steer clear of spots with poor air circulation, which can make your hyssop plant more susceptible to fungal diseases.
Selecting the Right Variety
- To grow healthy and thriving hyssop plants, it’s essential to prepare the soil correctly before planting.
- The first step in preparing the soil for hyssop is to choose a location with well-draining soil that is rich in organic matter.
- Hyssop prefers slightly acidic to neutral soil pH, ranging from 6.0 to 7.0, and can tolerate a wide range of temperatures.
- To prepare the soil, start by loosening it to a depth of about 12 inches using a garden fork or tiller.
- Remove any debris, such as rocks or weeds, and mix in a 2-inch layer of compost or well-rotted manure to improve soil fertility and drainage.
- Add a balanced fertilizer according to the manufacturer’s instructions, taking care not to over-fertilize, which can harm the plants.
- Finally, rake the soil to create a smooth surface and level it to ensure even growth.
- Once the soil is prepared, it’s time to select the right variety of hyssop for your specific needs.
- There are several different types of hyssop, including dwarf varieties that grow only 12-18 inches tall, and taller varieties that can reach up to 3 feet or more.
- Dwarf varieties are ideal for small gardens or containers, while taller varieties are better suited to larger gardens where they can grow freely.
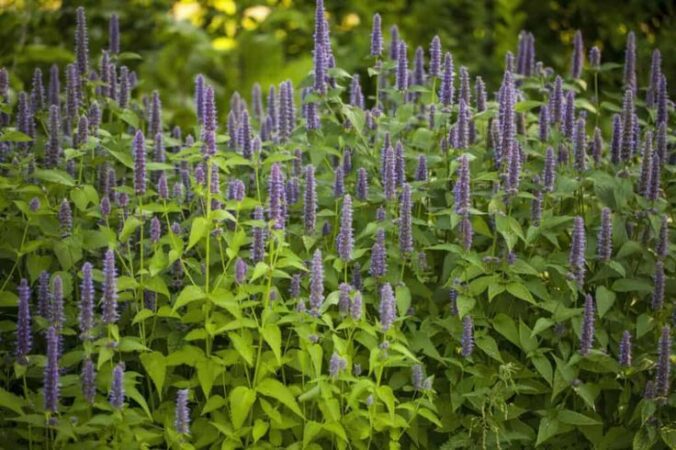
- Another consideration when selecting a variety of hyssop is the color of its flowers, which range from white and pink to purple and blue.
- If you want to attract pollinators such as bees and butterflies to your garden, choose a variety with blue or purple flowers.
- Finally, consider the hardiness zone in which you live when selecting a variety of hyssop.
- Hysso prefers full sun and well-draining soil, making it an excellent choice for gardens in cooler climates where other herbs may struggle to thrive.
- In warmer climates, be sure to choose a heat-tolerant variety that can handle the high temperatures and humidity.
Opt for a compact or dwarf variety of hyssop, such as Hyssopus officinalis ‘Roseus’, which is less invasive and easier to manage.
- Preparing the soil for hyssop growth is a crucial step that sets the foundation for a healthy and thriving plant.
- First, choose a location with well-draining soil as hyssop does not tolerate waterlogged conditions.
- The ideal soil pH for growing hyssop ranges from slightly acidic to neutral, between 6.0 and 7.0.
- To achieve the perfect soil texture, mix in compost or aged manure to improve its fertility and drainage properties.
- For a compact or dwarf variety of hyssop such as Hyssopus officinalis ‘Roseus’, which is less invasive and easier to manage, consider using raised beds or containers to contain the plant’s growth.
- Avoid using mulch directly around the base of the plant as it can lead to moisture retention and potential root rot.
- Instead, create a barrier between the soil and any surrounding plants by layering gravel or small rocks to prevent invasive spread and retain soil nutrients.
- Till the top 8-10 inches of soil to loosen and aerate it, making room for new growth and improving the overall structure of the soil.
Cultivating Hyssop
Planting and Spacing
Cultivating hyssop requires careful attention to soil quality, moisture levels, and sunlight exposure. To begin with, choose a location that receives full sun to partial shade, as this will promote healthy growth and maximize flavor.
The ideal soil for cultivating hyssop is well-draining and rich in nutrients. It’s essential to have a pH level between 6.0 and 7.0, which can be achieved by adding organic matter such as compost or manure to the soil.
When planting hyssop, make sure to space the seeds or seedlings 12-18 inches apart in rows that are 24-36 inches wide. This will give them sufficient room to grow without overcrowding and competing for resources.
Here’s a more detailed breakdown of spacing for different growing methods:
- Direct Sowing: 12-18 inches apart, 24-36 inches between rows
- Sow indoors and transplant: 6-8 inches apart in cell packs or trays, then transplant 12-18 inches apart when seedlings have 2-3 sets of leaves
After planting, keep the soil consistently moist during the first few weeks. Watering deeply once or twice a week is usually sufficient, depending on weather conditions. However, make sure not to overwater, as this can lead to root rot and other problems.
As your hyssop plants grow, you may need to provide support with stakes or trellises. This will help keep them upright and promote better air circulation around the leaves and stems.
Keep in mind that hyssop is a perennial herb in many climates, but it can also be grown as an annual in areas where winters are too harsh for it to survive. If you’re growing it as an annual, make sure to harvest the leaves regularly to encourage new growth and prevent flowering.
Plant individual plants 1218 inches apart in late spring or early summer after the last frost date, when soil has warmed up to at least 60°F (15°C).
The ideal time to cultivate hyssop depends on the climate and region where it will be planted. In general, late spring or early summer is the best time to plant individual hyssop plants 12-18 inches apart after the last frost date. This allows the soil to warm up to at least 60°F (15°C), which is essential for proper germination and growth.
Before planting, make sure the soil has been prepared by loosening it to a depth of about 8-10 inches. Hyssop prefers well-draining soil that is rich in organic matter, so add compost or well-rotted manure to improve its structure and fertility.
Plant the hyssop seeds 1/8 inch deep and 12-18 inches apart in rows that are 2-3 feet apart. Water gently but thoroughly after planting, and keep the soil consistently moist during the first few weeks after planting.
Once established, hyssop is relatively low-maintenance and can tolerate some neglect. However, it will perform best if it receives regular watering and fertilization. Avoid over-fertilizing, as this can lead to weak growth and a lack of flowering.
To promote healthy growth and prevent disease, make sure the soil is well-draining and has a pH between 6.0 and 7. Also, avoid overcrowding the plants, as this can create an environment that is conducive to fungal diseases.
Here are some tips for specific growing conditions:
- Warm weather: In regions with hot summers, provide hyssop with some afternoon shade to prevent scorching. Water deeply but infrequently to encourage deep root growth and make the plant more resistant to drought.
- Cooler climates: In areas with cool summers, hyssop may require staking or other support to prevent it from toppling over in the wind. Provide it with a layer of mulch to retain moisture and regulate soil temperature.
With proper care and attention, hyssop can be a rewarding and fragrant addition to any garden or herb bed. It is relatively pest- and disease-free, making it an excellent choice for beginners or experienced gardeners alike.
Maintaining Healthy Plants
Watering and Fertilization
Hyssop is a versatile and aromatic herb that thrives when provided with proper care. Maintaining healthy plants involves understanding its specific needs, particularly when it comes to watering and fertilization.
To ensure your hyssop plant receives the right amount of water, follow these guidelines:
- Maintain a consistent watering schedule, allowing the soil to dry slightly between waterings. Hyssop is relatively drought-tolerant but still requires sufficient moisture to grow vigorously.
- Water your hyssop plant in the morning or early afternoon, so the soil has time to dry slightly before nightfall. This helps prevent root rot and other issues associated with excessive moisture.
Fertilization plays a crucial role in promoting healthy growth and maximizing yields. Here’s how you can fertilize your hyssop plant:
- Use a balanced, water-soluble fertilizer (20-20-20) or a high-phosphorus formula to promote flowering and root development.
- Apply the fertilizer at the recommended rate, usually 1-2 tablespoons per gallon of water. You can also consider using organic fertilizers like compost tea or worm casting.
In addition to proper watering and fertilization, there are other factors to consider when maintaining healthy hyssop plants:
- Pest control: Regularly inspect your plant for signs of pests like aphids, whiteflies, or spider mites. Use organic pest control methods whenever possible.
- Pruning: Prune your hyssop plant regularly to promote bushy growth, encourage new stems, and prevent the plant from becoming leggy.
By following these tips and guidelines, you should be able to grow a thriving and healthy hyssop plant. With proper care and attention, this versatile herb will provide you with an abundance of aromatic leaves and flowers for years to come.
Avoid overwatering by keeping the soil consistently moist but not waterlogged, and fertilize lightly in early spring with a balanced, slow release fertilizer.
Maintaining healthy plants is essential for their optimal growth and development. When it comes to growing hyssop, there are several key factors to consider.
Firstly, ensure that your soil consistently moist but not waterlogged. Overwatering can lead to root rot and other problems, whereas under-watering may cause the leaves to wilt and drop. To achieve this delicate balance, check the moisture level of the soil regularly by inserting a finger into the soil up to the first knuckle. Water only when necessary.
It’s also important to fertilize your hyssop plants lightly in early spring with a balanced, slow-release fertilizer. This type of fertilizer provides essential nutrients such as nitrogen, phosphorus, and potassium without burning or overwhelming the roots.
Avoid over-fertilizing, which can damage the plant and reduce its yield. A general-purpose 10-10-10 NPK (nitrogen-phosphorus-potassium) slow-release fertilizer is ideal for most garden soil types.
Other factors that contribute to maintaining healthy hyssop plants include pruning, repotting, and providing adequate sunlight and air circulation.
Prune your hyssop plants in the fall after they have finished blooming, cutting back about one-third of the plant’s growth. This encourages new growth and promotes bushy development.
If you need to repot your hyssop, choose a container that is only slightly larger than the original pot. Hyssop prefers well-draining soil and can be sensitive to root rot if the potting mix becomes too wet.
Finally, ensure that your plants are receiving sufficient sunlight by placing them in an area with full sun (at least 6 hours of direct sunlight per day). Proper air circulation is also essential for preventing fungal diseases, which can thrive in humid environments.
Pruning and Pest Management
Maintaining healthy plants requires careful attention to their needs, including watering, fertilizing, and pruning. When it comes to growing hyssop, proper care can ensure a robust and thriving plant that produces plenty of flowers and foliage.
One of the most essential aspects of maintaining healthy plants is water management. Hyssop prefers well-drained soil and can be susceptible to root rot if the soil is too moist. Check the soil daily, and avoid watering during periods of rainfall or when the top inch of soil feels dry to the touch.
Fertilizing is another crucial aspect of plant care. Feed your hyssop plants with a balanced fertilizer (10-10-10) in early spring, following the manufacturer’s instructions. You can also side-dress with a high-phosphorus fertilizer (10-20-10) to promote blooming.
Pruning is essential for maintaining the shape and size of your hyssop plants, as well as promoting healthy growth. Prune your hyssop in early spring by cutting back stems to about one-third their height. Remove any dead or damaged branches, and trim back any leggy stems to encourage bushy growth.
Pruning also plays a critical role in maintaining the plant’s overall health. Regular pruning helps prevent disease and pest problems by removing diseased or infested areas. Prune your hyssop regularly to promote air circulation, reduce humidity, and minimize the risk of disease and pests.
Pest management is an essential aspect of growing healthy plants. Common pests that can affect hyssop include aphids, whiteflies, and spider mites. Check your plants regularly for signs of infestation, such as sticky honeydew or tiny eggs on the leaves.
Control pest populations by using integrated pest management (IPM) techniques. These may include physical barriers, insecticidal soap, neem oil, and other natural methods to control pests without harming beneficial insects or the environment.
Some of the most common diseases that can affect hyssop include powdery mildew, root rot, and leaf spot. Regularly inspect your plants for signs of disease, such as white powder on the leaves, yellowing foliage, or black spots on the stems.
Control disease outbreaks by practicing good hygiene, removing any infected areas, and improving air circulation. Use fungicides if necessary, but be sure to follow the manufacturer’s instructions carefully to avoid harming beneficial microorganisms in the soil.
Maintaining healthy plants requires a combination of proper care, pruning, and pest management. By following these tips, you can promote healthy growth, prevent disease and pest problems, and enjoy a robust and thriving hyssop plant that produces plenty of flowers and foliage for years to come.
Regularly prune back flowering stems to encourage bushy growth and prevent seed production, which can lead to invasive spreading.
To maintain healthy plants, it’s essential to understand their needs and provide them with the right conditions to thrive.
For hyssop, a perennial herb prized for its culinary and medicinal properties, regular maintenance is crucial to encourage bushy growth and prevent invasive spreading.
Maintenance Tips
- Watering: Hyssop requires well-draining soil and moderate watering. Avoid overwatering, as this can lead to root rot and other problems.
- Fertilization: Feed your hyssop plant with a balanced fertilizer during the growing season (spring and summer) to promote healthy growth.
Pruning
Regular pruning is necessary to maintain the shape of your hyssop plant, encourage bushy growth, and prevent seed production, which can lead to invasive spreading.
- Remove Flower Stems: After flowering has finished, cut back flower stems to about half their height. This will help direct energy towards foliage growth, resulting in a fuller plant.
- Deadheading: Regularly remove spent flowers to encourage your hyssop plant to produce new blooms and prevent seed production.
Tips for Specific Conditions
Depending on your climate, you may need to adjust your maintenance routine. For example:
- Cold Winters: In areas with harsh winters, provide protection for your hyssop plant by mulching around the base and covering it with a breathable cloth or sheet.
- Hot Summers: In regions with intense heat, ensure consistent moisture levels to prevent water stress, which can damage your plant’s leaves and stems.
By following these guidelines and adapting them to your local climate and growing conditions, you’ll be well on your way to maintaining a thriving hyssop plant that provides years of enjoyment and benefits from its fragrant blooms and culinary uses.
- Where to Find THC Infused Seltzers in Arizona - May 19, 2025
- Illinois THC Beverages You’ll Love - May 9, 2025
- Unlock Your Canadian Dream: Inside the New Brunswick Hiring Event 2025 - May 3, 2025